 | ||||

Aseptic Technique to Pour Bacterial
Growth Media into Petri Dishes
In the lab, bacteria are often grown on an all-purpose bacterial growth medium such as tryptic soy agar (TSY). TSY provides nutrients, moisture and the proper pH for most bacteria to grow.
Article Summary: Bacteria are typically grown in isolated cultures, with one type of bacteria grown on each plate. Therefore, the growing medium must initially be sterile.
How to Pour Growth Media into Petri Dish
Step 2 - Light the Bunsen Burner: Hook the tubing of the Bunsen burner up to the gas valve. Turn on the gas. If using a match, run the lit match up the stem of the burner until it lights (to avoid burning yourself). Adjust the flame so that there is a small, bright blue cone in the center. Extinguish the match and set it on the bench, making sure not to throw the match in the trash until it has cooled.
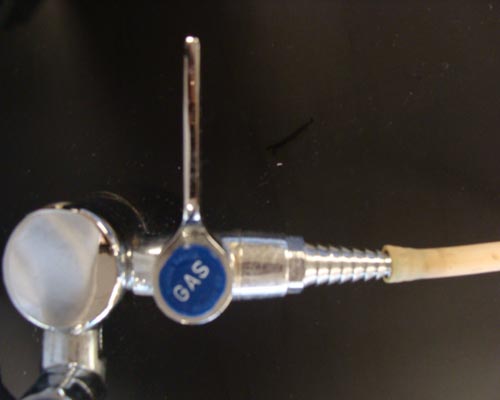
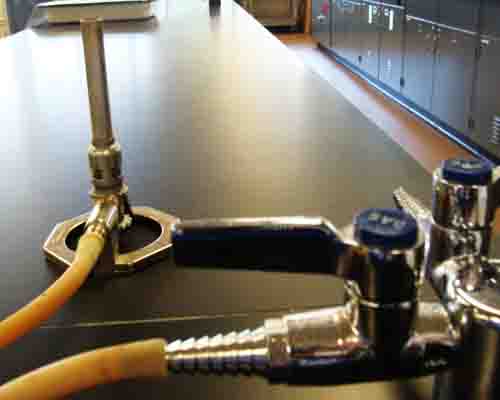
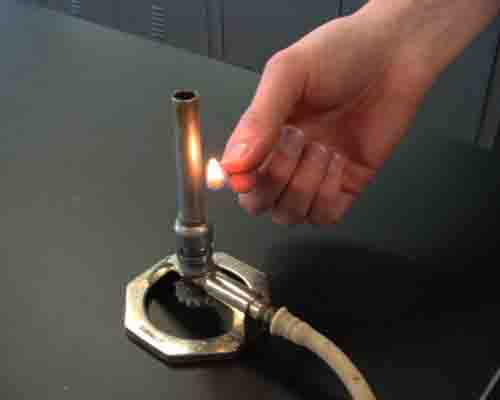
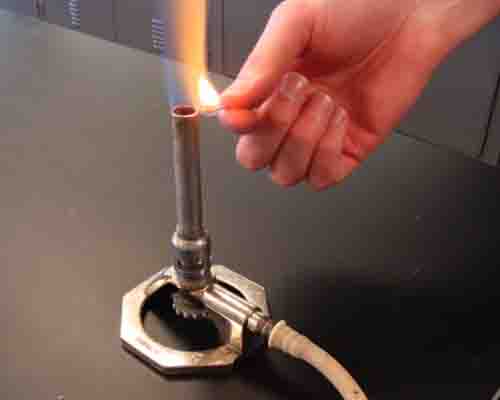
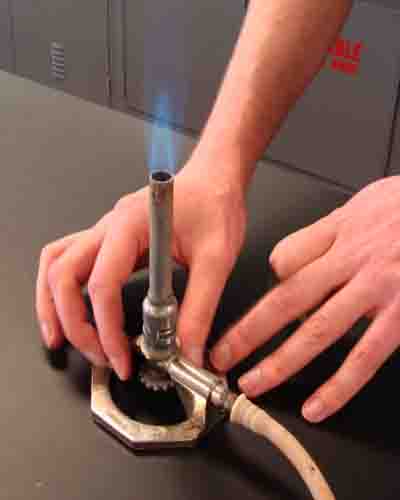
1. Lab gas valve in OFF position; 2. Lab gas valve in ON position with Bunsen burner in background; 3 & 4. Light burner by running lit match up the side until it lights the gas; Adjust the height of the flame with the cog underneath the burner. (Click on photos to enlarge.
SPO VIRTUAL CLASSROOMS
| ||||||

Agar is a Jello-like substance that is liquid when heated and solid when cooled, and it must be sterilized before use.
For sterilization, freshly mixed agar is poured into loosely capped bottles and placed in anautoclave, where high temperatures and pressure are used to kill microbes currently in the agar. After the agar is sterilized, it is stored in a warming oven, so that it remains liquid, and ready for use.
Pouring Agar to Create Sterile Plates
Agar is often ultimately poured into sterile Petri dishes (plates). If aseptic technique is not used, bacteria from the environment will be introduced to the media, and the media will become contaminated and useless.
The supplies needed to pour sterile plates are:
- a Bunson burner
- sterile Petri dishes (glass or plastic)
- matches
- a bottle of warm sterilized agar
Step 1 - Set Up All Materials: Before pouring the agar, make sure that everything is properly set up. The Bunsen burner should be hooked up to the gas supply, matches handy, and the sterile Petri dishes positioned close to the Bunsen burner. The farther the Petri dishes are from the burner, the more opportunity there will be for contamination to occur while pouring the plates.

SCIENCE VIDEOS

Page last updated:
8/2015
You have free access to a large collection of materials used in a college-level introductory microbiology course. The Virtual Microbiology Classroom provides a wide range of free educational resources including PowerPoint Lectures, Study Guides, Review Questions and Practice Test Questions.

The SPO website is best viewed in Microsoft Explorer, Google Chrome or Apple Safari.

VIDEO: How to Aseptically Pour Bacterial Growth Media